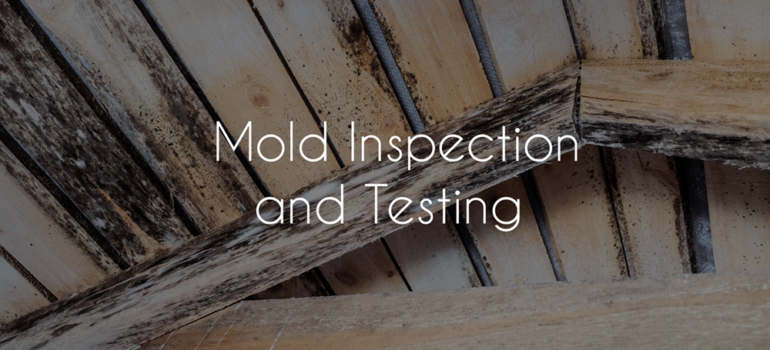
Mold Inspections & Testing

MOLD… literally, is a growing concern. National media attention has alerted the public to the destructive and possibly toxic dangers of hidden mold spores that could affect their family’s health and their homes. EPA studies indicate that air levels of indoor pollutants may be two to three times higher than outdoor levels. Mold, the most dangerous offender of all, often goes undetected because of its invisibility. Most people spend as much as 90% of their time indoors and are not aware of the health hazards created by this pollutant. You owe it to yourself to minimize your exposure to mold spores in your indoor environment, test for mold today!

How can someone be exposed to MOLD?

There are several ways you can become exposed to mold:

  • Breathing in the spores from the air
  • Skin contact from handling an item that has mold growing on it
  • Eating without properly washing your hands after handling moldy objects

Can MOLD cause health problems?

Mold has the potential to cause health problems and even make a home uninhabitable. However, everyone is affected differently when in contact with mold. The mold that may not bother the seller may severely affect the buyer. Some mold can produce allergens, irritants and, in some cases, potentially toxic chemical substances known as mycotoxins. People who are sensitive and exposed to mycotoxins can become ill.

Allergic reactions to mold are common. They can be immediate or delayed. People diagnosed with allergies and asthma may be very sensitive to mold. Mold can cause asthma attacks. Others at risk might include: infants, children, the elderly, patients who have a deficient immune system, pregnant women and individuals with existing respiratory conditions.

With exposure, even in small amounts, mold may cause:

  • Itching or irritation of the nose, eyes, throat or skin
  • Mysterious skin rashes
  • Sinus infections, congestion and/or sinusitis (runny nose)
  • Respiratory problems (sneezing and coughing)
  • Fatigue
  • Frequent headaches
  • Trouble concentrating, memory lapses and/or confusion
  • Mood swings, anxiety and/or depression
  • Chronic aches and pains
  • Digestive problems

Where is MOLD found in the home?

Mold can be found in several areas in the home environment. It appears most often in moist areas as little black circles or thread-like white objects. It is usually accompanied with a musty-type odor. Outdoors, mold plays a natural part in the environment by breaking down dead organic matter such as dead trees or fallen leaves.

Mold reproduces by means of microscopic spores; the spores are invisible to the naked eye and float through the indoor and outdoor air. Mold begins to grow indoors when mold spores land on surfaces that are wet or damp. Mold will not grow without water or moisture. Therefore, it is important to dry water-damaged areas and items within 24-48 hours to prevent mold growth.

Some examples of places where mold can be found inside the home include:

  • Basements, kitchens (bottom of fridge), around bathroom vanities, washer/dryer area
  • The underside of carpets and pads
  • The surface of walls behind furniture (where condensation forms)
  • Ceilings and the top side of ceiling tiles
  • Front and back side of dry wall, wall paper or paneling
  • Inside HVAC systems and duct work
  • Clothing
  • Food

Testing for MOLD

There are several methods used today to test for mold. Two of the most common are direct culture and air spore sampling. With direct culture, a sample is collected using a swab and sent to a lab for analysis. The swab is then plated on media that elicits growth. When the mold has matured sufficiently, lab personnel are then able to identify it. This is the preferred method when there is visible mold present. The draw back to this method is that it can take up to 14 days to grow and identify the type of mold, if any.

With direct sampling, a device used to capture mold spores is attached to an aspiration device (pump). The pump sucks the air through the device for a specific amount of time and a specific volume of air. The device is then sent to the lab for analysis. The lab personnel count each type of mold spore and a quantitative comparison is done between indoor and outdoor sample. This is the preferred method when timing is important and if it is unclear whether or not mold is present. The drawback to this method is that it takes a minimum of two samples, an indoor and outdoor sample, which can be expensive.

How can I reduce or eliminate MOLD inside my home?

It is impossible to completely eliminate all mold and mold spores indoors. Mold will always be found floating in the air and in house dust. Indoor mold growth can be prevented by controlling water and moisture indoors. The following may prevent or reduce indoor mold growth:

  • Repair any water leaks
  • Provide good air circulation
  • All HVAC systems should have a good electrostatic filter on the return
  • Use bathroom, kitchen and laundry room exhaust fans
  • Insulate and ventilate attic and crawl space areas
  • Clean, dry or remove items that are damaged by water immediately.

Additional ResourcesFacts about MoldGot Mold? FAQs about MoldMold Allergy (Asthma and Allergy Foundation of America)Environmental Protection AgencyEnvironmental Protection Agency (A Brief Guide to Mold, Moisture and Your Home)State of Missouri Department of Health and Senior Services

*Information partially transcribed from Pro Labs Mold brochure

Read More

Radon Testing

Radon is a colorless, odorless, inert radioactive gas. You can’t see it, smell it or feel it but it is always present in the air we breath- approximately 0.35 pCi/L (picocuries per liter) in normal outside air. Radon comes from the natural radioactive decay of radium and uranium found in the soil. Radon levels in the soil can range from a few hundred to a several thousand pCi/L.

The amount of radon required to cause health issue is a hotly debated topic. The EPA states that levels >4 pCi/L can impose a health risk. This debated level varies greatly when attributed to a persons life style habits, for example: Smoking, family history of cancer, young children, etc. The EPA radon map of Missouri lists southwest Missouri area in a moderate risk category, on average, between 2 and 4 pCi/L.

We need to understand that if our radon levels are greater than this, it doesn’t necessarily mean that we are in immediate danger. However, careful study of our life style risks in comparison to the actual radon levels should be evaluated.

A really good article that we found was an article by G. Thomas Martin entitled, “Understanding Radon”. This article covered most all of the specifics of radon at an understandable level and can be found at: http://www.discoverit.com/at/phi/article.html.

Additional ResourcesEnvironmental Protection AgencyEPA’s RADON Map of MissouriRadiation, Science & HealthNational Radon Safety BoardThe National Environmental Health AssociationState of Missouri Department of Health and Senior Services

Read More

All About Septic Tanks

How an On lot (Septic) System Functions

There are two basic types of anaerobic (without Oxygen) on lot systems; those with gravity distribution systems and those with pressure distribution systems. In both types, there are three major components:

  1. The septic tank
  2. The distribution box (gravity system) or dosing tank (pressure system)
  3. The absorption area

Sewage flows to the septic tank, where the primary treatment process takes place. In the tank, the heaviest matter settles to the bottom (forming sludge) and the lighter matter (scum) floats on top of a somewhat clear liquid called effluent. While the sludge and scum must be pumped out regularly, the clear liquid flows out of the tank to a distribution box or dosing tank, and is then directed to the absorption area by gravity flow or through pressurized pipes. Within the absorption area, this effluent exits through pipes into a layer of gravel and then percolates through the soil for additional treatment. The bacterium in the soil neutralizes many of the contaminants in the wastewater.

Septic System Inspection

A load and dye test is the most common test requested; however, it is a limited method of testing the septic system. The septic tank must be accessible for the evaluation for a thorough inspection. The seller is responsible for locating and uncovering the septic tank according to the standard real estate contracts.

OnLot (Septic) System Operation and Maintenance

(Homeowner’s Guide)

The best designed and properly installed on lot sewage disposal system will still malfunction if the homeowner does not properly operate and maintain the system. In addition to requiring costly repairs, malfunctioning systems can contaminate surface and groundwater, cause various health problems and spread disease as well as create unsightly messes and foul odors when raw sewage surfaces or backs up into the home.

Signs of an on lot system in trouble include:

  • Toilet runs sluggish
  • Sewer odors in the house and/or in the drinking water
  • Illness, often to household visitors
  • Sponginess around septic tank, distribution box or dosing tank and absorption area
  • Surfacing raw sewage
  • Dosing pump runs constantly or not at all
  • Dosing tank alarm light is on
  • Backup of sewage into laundry tubs or other fixtures

Preventing Malfunctions

Homeowners can help prevent malfunctions and ensure the long-term use of their on lot system by doing the following:

  • Conserving water and reducing waste flow into the septic tank
  • Having the septic tank pumped at least every 3 – 5 years, depending upon tank size and household size
  • Avoiding putting chemicals in the septic system
  • Not using the toilet to dispose of bulky, slowly decomposing wastes
  • Inspecting the septic tank, pipes and drainage field annually
  • Maintaining accurate records of the septic system (design, installation, location, inspections, pumping, malfunctions, repairs)
  • Preventing run-off from downspouts, sump pumps, and paved surfaces from getting into the septic system
  • Keeping heavy vehicles, equipment and livestock away form the septic system
  • Not planting trees and shrubs over or close to the septic system

Conserving Water and Reducing Waste Flow

On lot systems not only treat and dispose of domestic sewage from toilets, they also receive wastewater from various other household fixtures, including baths, showers, kitchen sinks, garbage disposals, automatic dishwaters and laundries. Conserving water and reducing the amount of waste flow from household activities is an important step to ensuring long-term use. The more water-using devices in a household, the greater the burden is on the on lot system. Following are some helpful water conservation tips and a comparison of water usage between conventional fixtures versus water-saving fixtures.

  • Use the dishwasher and laundry washer only when they are loaded to capacity
    • Top Loading Laundry Washer 35 – 50 gal/load
    • Front Loading Laundry Washer 22 – 25 gal/load
  • Fix leaky faucets and plumbing fixtures quickly. Install flow control (regulator) devices on faucets
    • Regular Faucet Aerator 2.5 – 6 gal/min
    • Flow regulating Aerator 0.5 – 2.5 gal/min
  • Take short showers instead of baths. Install flow control or water saving devices on showerheads and other plumbing fixtures
    • Conventional Showerhead 3 – 15 gal/min
    • Water Saving Showerhead 2 – 3 gal/min
  • Reduce water use each time you flush the toilet. Put a heavy device such as a brick in a plastic bag or a water-filled plastic bottle in the reservoir or install a low flow toilet
    • Conventional Toilet 4 – 6 gal/flush
    • Water Saving Toilet 1.6 – 3 gal/flush
  • Use the garbage disposal sparingly. These wastes place a greater burden on the septic system. If you have garden space, compost the material instead

Pumping Your Septic Tank

A septic tank accumulates solids (sludge) and scum which should be pumped out at least every three to five years. The frequency of pumping depends upon tank size and household size. Larger households generally require more frequent pumping (every one or two years). In Missouri, specific tank sizes are generally based on the number of bedrooms in the home because the number of bedrooms is an indicator of household size. For example, a home with three bedrooms must have a 900 gallon or larger septic tank- The more bedrooms, the larger the septic tank. For more information on the recommended frequency of pumping, contact your local agency (normally your local township) Sewage Enforcement Officer or the Department of Environmental Protection.

Your Toilet Is Not A Trash Can!

Trillions of living, beneficial bacteria constantly treat and decompose raw sewage in a septic system. The effectiveness of these bacteria can be impaired if harmful substances and chemicals are put into the septic system. Harmful substances/chemicals include:

  • Oils and grease
  • Gasoline
  • Antifreeze
  • Varnishes and paints and solvents
  • Harsh drain and toilet bowl cleaners
  • Laundry detergents with high sudsing elements
  • Bleach
  • Pesticides

Remember, what goes into your toilet and drains many eventually end up back in your drinking water. So instead of using caustic toilet bowl cleaners or bleach, try mild detergent or baking soda or one half cup of borax per gallon of water. Also NEVER flush bulky, hard to decompose items such a sanitary napkins, diapers, paper towels, cigarette filters, plastics, eggshells, bones or coffee grounds down the toilet because they can clog the system.

Additional ResourcesEnvironmental Protection AgencyEPA’s RADON Map of MissouriRadiation, Science & HealthNational Radon Safety BoardThe National Environmental Health AssociationState of Missouri Department of Health and Senior Services

Read More

Termite Inspections

Termites are the number one cause of home damage in the United States. They do more damage each year than fires, floods, tornados and hurricanes combined. Termites are the best-organized enemy you’ll ever face. They are tough, determined and highly efficient. Chances are that you won’t see evidence of their work until structural damage has been done. There can be as many as 13 to 14 subterranean termite colonies per acre. Each colony can contain as many as one million termites and they are able to travel up to 130 feet from the colony.

The presence of swarmer termites or alates, which resemble flying ants, is a strong indication that termites are infesting a structure and it should be inspected immediately. Subterranean termites are quite common in most of the U.S. with increasing activity and abundance in the southern states and warmer climates. Termite infestation is no reason to panic, modern control techniques are quite safe and effective and termites work relatively slowly.

Subterranean termites, which are the most common in Missouri, need constant moisture and protection from the elements and predators. Termites may tunnel through softer surfaces such as drywall, paint and carpet padding even though they are not edible. Termites spend most of their time underground in their colony or foraging for food. Whenever termites come above ground, they build “shelter tubes” or “mud tubes” made from bits of mud, saliva and feces. Termite shelter tubes may be visible on infested wood or traversing impervious surfaces between the soil and wood such as concrete foundations, pipes and drywall. These termite shelter tubes keep the moisture inside the tunnel system and provide protection from predators. Termite shelter tubes can sometimes be seen going up concrete foundation walls in basements and crawlspaces, up exterior foundation walls, in cracks behind door jambs, along floor joists or in the hollow voids of concrete blocks.  

Because termite evidence is often hidden for many years before it is detected, behind insulation, boxes, stored items, vegetation, fixed walls, ceiling areas and drywall; it sometimes takes a well trained eye to spot termite activity. We recommend a professional termite inspection at least once a year.

Concrete slab homes and homes with additions are often the places where termites are overlooked because of the lack of unfinished areas. Often significant damage can be done before termites are detected. Sometimes termites are not detected until small bits if mud or shelter tubes are seen protruding through drywall, wallpaper or ceilings.

TERMITE INSPECTION

In most cases the buyer of the property is responsible for arranging the termite inspection, paying for the report and choosing the inspecting company. Should treatment be needed it is generally the responsibility of the owner to arrange for treatment by the company of their choice and pay for treatment. Homes bought with cash, at auction or under other circumstances may not require a termite inspection; however, it is still highly recommended as it may prevent further damage if there is activity or just to provide piece of mind that there is no infestation.

Real estate termite inspections are inspections that should be performed by an experienced, licensed termite inspector. These termite reports are often required by lending institutions such as banks, mortgage companies and refinance companies. Sometimes called a termite report, a WDI (Wood Destroying Insect), WDO (Wood Destroying Organism) or other real estate inspection report; it should also reveal infestations of any wood destroying organism in the structure. You may also hear these reports called termite letters or certification letters. These are not the same as “free” termite inspections which are often undocumented. In Missouri, a termite report is usually done on standard NPMA-33 termite report form. We’ll do a thorough inspection for past or present signs of wood destroying insects such as subterranean termites, carpenter ants, carpenter bees, and wood destroying beetles as well as provide recommendations for treatment. Even if you’ve already had a termite report done, our low cost wood destroying insect reports allow you to get a “second opinion” to ensure that the findings are accurate.

For subterranean termite activity, a thorough inspection should be done of the foundation. This usually starts with a check of the outside foundation for termite shelter tubes or wood that may shows signs of termite infestation. The basement or crawlspace should be checked, examining the sill plate, band board, and floor joists for weak spots, termite damage, or termite shelter tubes. Any insulation blocking view of the wood members will hinder the inspection however it can usually be moved aside. The other floors should also be checked for termite shelter tubes on baseboards, door and window frames, and walls. If possible the attic should be checked, occasionally subterranean termites may work their way to the attic without any visible signs in other areas.

Although Dry Wood Termites can not survive in Missouri for any length of time, they may be imported from different states and require a different procedure. Dry wood termites don’t require contact with the soil and can exist in wall studs, ceilings, furniture, and other wood. Other possible infestations include carpenter ants, carpenter bees, various wood infesting beetles and wood destroying fungus.

A wood destroying organism infestation report usually covers only readily accessible areas. Areas where evidence or damage is hidden are not included in the report and inaccessible areas should be described on the report. Inaccessible areas may include crawlspaces or parts of crawlspaces that may be too low for access, crawlspaces with no access point, blocked or sealed crawlspace and attic openings, areas behind fixed wall and ceiling coverings and areas obscured by dense vegetation. If you are buying a property, you should consider being present when the termite report is being done and make sure that there is access to crawlspaces for inspection.

TREATMENT

Types of termite treatment may include conventional liquid soil treatment, termite bait and monitoring systems and fumigation or “tenting”(Dry Wood Termites) performed by a professional pest control company. The subterranean termite found in the U.S. can be controlled in a number of ways. Chemical barrier treatment is still the most common way to treat subterranean termite infestations. A trained technician will apply either a repellent or non-repellent termiticide formula to the foundation of the structure. The idea is to place the chemical in all areas that termites could enter the structure. Not all treatment options are available for all structure types or conditions.

Another termite treatment option is termite bait and monitoring systems. These systems use bait stations baited with small pieces of wood. These stations are inspected periodically and when activity is found, the wood is replaced with slow acting bait designed to reduce the number of the termites in the colony or eliminate the colony all together. A termite inspection will allow the termite control professional to determine the best treatment method for each situation.

Read More

How to Prepare for an Inspection

We’ve assembled these guidelines as suggestions and helpful hints for your convenience. They are not meant to be all encompassing or even a complete list of every possible scenario, only general guidelines.

While it may not be politically correct to say this, it is true- Women are the initial decision makers when a couple is buying a home. If she doesn’t like your home, guess what- their not buying it! That being said, the single most effective thing you can do is to make sure your home is clean, organized and cosmetically appealing. Debris, trash, dishes, clothes, etc. should be cleaned up and put away. While showing your home, have something baking. Nothing says home like the smell of fresh baked bread or cookies!

Often, home sellers are unaware of defects or situations that exist in their home. After all, it’s always been that way or you’ve never noticed it before. Every home has deficiencies as well as positive attributes. Don’t be discouraged when items are identified as defective or in need of repair. REMEMBER: There is no such thing as a perfect home!

If you’re going to have an inspection:

  • Furniture, boxes, etc. should be pulled out, put away or arranged to allow access to outlets, switches, windows, doors, plumbing and HVAC systems.
  • Insure that all utilities will be on during the inspection and that you have enough gas to complete the inspection (if you have gas appliances).
  • Debris, trash, dishes, clothes, etc. should be cleaned up and put away.

NEVER attempt to perform any repair that you’re not COMPLETELY comfortable with, especially when it comes to electrical or other safety issues such as roof repairs (height- danger of falling). Let’s break down each section individually for your convenience.

LANDSCAPING

  • Insure that your yard is clean and free of trash and debris. It would be wise to have the yard mown but certainly not necessary.
  • Bushes and trees should be trimmed away from the home. Including but not limited to: off of the roof and away from the eaves.
  • All holes or run offs should be filled.

REMEMBER: The first impression is usually a lasting impression!

EXTERIOR

  • Insure all exterior hose bibs are operating and do not leak.
  • Insure all exterior electrical outlets are working.
    • If you have GFCI’s (Ground Fault Circuit Interrupter), please insure they trip properly. You can buy a cheap tester at the hardware store that has a GFCI tripping button for around $10-$15.
    • Insure they are secure in their mountings.
    • Exterior outlets should have weather covers.
  • Insure all exterior lighting is working properly.
  • Do not use extension cords or their wires as permanent wiring.
  • Insure that your wall cladding (vinyl, brick, wood, stucco) is secure
    • Vinyl panels will slide out of place and simply needs to be pushed or pulled back into place.
    • Brick will often have stress or settling cracks that looks a lot worse than it really is. Re-parging can be time consuming but may be worth your time and effort.
    • Wood siding can be loose and should be re-secured. Wood rot is a common problem with wood siding. Although the rot is still present, it can be made to look a lot better with a little paint
  • Insure all window screens are in place and not damaged. If they are stored, leave a note as to their location.
  • Older wood frame windows may need to be re-caulked and painted.
  • Garage doors are often a safety write up if the auto reverse does not work as designed
    • Ideally, laser “eyes” should be installed to prevent injury to small children or animals. They should cause the garage door to stop and reverse suddenly when the light path is broken.
    • While standing next to the garage door but not breaking the laser path, have someone close the garage door. At about hip level, try to stop the door with a little resistance. It should auto reverse as well. Don’t use He-Man strength to stop it! Let it go, as you may inadvertently damage the door if you use too much force. If the door did not auto reverse, use the owners manual that came with the door or other resources to adjust the resistance.

REMEMBER: A little paint goes a long way towards the appeal of the home. Home buyers often make mental checklists as to how much they have to do to make the home livable in their eyes.

ROOFING

When performing any roof repairs- SAFETY FIRST! If you do not have a safe way to perform these actions, DO NOT ATTEMPT! Call a repairman/handyman.

  • Insure your roof is free of debris.
  • Replace any missing or loose shingles.
  • Often, nails will start to “back out” leaving a bulge. Without damaging the shingles, simple lift up the shingle and re-nail. During cold months, they may not lay back down for awhile. Just let the buyers know that you performed these repairs. A little communication goes a long way!
  • Gutters
    • Insure they are clean and free of debris; securely mounted; and are not leaking at the seams.
    • Insure your downspouts and discharge angles are securely mounted and in place.
    • A common write up is that the gutters discharge too close to the house. Ideally, they should discharge at least five feet from the home. This is not always practical, but if you have a basement or a wet crawlspace, you should seriously consider this. At a minimum, splash blocks should be installed.
  • Chimneys:
    • Insure they have rain caps and screens. Verify that they are free of cresol buildup. Note: If there hasn’t been a rain cap or screen, it may be full of debris just above the smoke shelf and not noticeable from the interior of the home.
    • Masonry chimneys can have loose mortar between the bricks. Re-parging may be necessary.
    • Make a note of the last time the chimney was cleaned and inspected.
  • Insure all miscellaneous roof mounted items are secured and not overly damaged.
  • Trim tree limbs away from the eaves. Any over hanging tree limbs should also be trimmed as they shade the roof, allow for the growth of mildew/lichen.

STRUCTURE/FOUNDATION

  • If you notice minor cracking in the foundation, don’t panic, this is normal. Most foundations experience some minor cracking. However, if you notice a gap of 1/8” or more, you may want to consider consulting a structural engineering company to perform repairs. If repairs are necessary, make sure you keep a record of the repairs for future buyers.
  • Block foundations may experience settling as well. Re-parging between the blocks will help with the cosmetic appearance.
  • In the attic check for:
    • Cracked rafters
    • Spliced wiring, missing CVR cover plates, etc.
  • In the crawl space check for: NOTE: If you smell gas or start to get dizzy: GET OUT & STAY OUT! Call a professional to investigate.
    • Damaged sub-flooring
    • Cracked Joists
    • Trash, debris, falling insulation.
    • Water or gas leaks.
    • Standing water.
  • REMEMBER: Honesty is ALWAYS the best policy! If you know something is seriously wrong with your home, get it repaired and/or let the future buyers know about it. List it on the disclosure form. It will be found out eventually and guess who their going to come after when it is discovered. By then, the problem will be MUCH worse!

ELECTRICAL

When performing any electrical repairs- SAFETY FIRST! If you have any doubts where safety is concerned or if you do not have a safe way to perform these actions, DO NOT ATTEMPT IT! Call an electrician, it’s cheaper than a trip to the ER!

In the main panel:

  • Check for double taps (two wires using the same breaker). If present, most boxes will accept a breaker that has two individual circuit breakers on the same breaker.
  • If you have aluminum distribution wiring (not in the main as they are often aluminum), insurethat ALL breakers with aluminum wiring are rated AL or AL/CU and ALL outlets/fixtures are rated AL or AL/CU.
  • Check for “cooked” wiring.
  • Is it clean and free of debris?
  • Check to make sure no water is getting into the box.
  • Test all GFCI and AFCI (Arc Fault Circuit Interrupter) in the panel by pushing the test button and then resetting them.
    • Check that all lights, permanent appliances and fixtures are working.
    •  Check all outlets
  • Recessed lighting fixtures must be IC rated. Meaning that they are rated to be in the ceiling with insulation touching the “can”. Often, you can’t see the rating on these lights so a home inspector may have a note in their report such as: “Verify recessed light rating. All recess lighting must be rated with an IC rating or have a minimum of 6” clearance around them. Ie. No insulation should be touching the “can”.”
  • Spliced wiring must be made in CVR junction boxes. Black tape or even electrical nut splices must be made in CVR junction boxes. Often, these splices will be made in the boxes but someone failed to put the cover plate on them. This is still unacceptable.
  • Extension cords or their wires should never be used as permanent or exterior wiring- EVER!

HVAC SYSTEMS

  • Exterior condensing unit for cooling:
    • Insure the unit is level
    • Insure the unit is not noisy from lack of maintenance. Often, a fin will get bent and simply bending it back will prevent a negative comment.
    • Insure the unit is clean.
    • Check all connections and verify that the freon line has insulation on it and it is not damaged.
  • Heating/blower unit:
    • Insure the unit is clean and free of debris.
    • Check unit for excessive noise. If so, have unit serviced.
    • If gas and you notice a “gas” smell- Have the unit serviced.
  • Insure the return air filters are clean.
  • If accessible, insure all ductwork is secure and properly installed. Some flex duct can work itself free over time.

    PLUMBING
  • If you have metered water you can easily check if you have a supply leak. It won’t help if you have a tiny leak but it will for larger ones. Turn off all water in the home and check the meter to verify that no water is being delivered to the home. On the meter there is usually a small red triangle/needle, this is the supply gauge and this is what you’re looking for.
  • Fill all sinks and tubs completely, drain and then check for supply and drain leaks (even in the crawl space).
  • Verify that hot water comes out using the left knob and cold from the right.
  • Check shower head for leakage.
  • For the hot water heater:
    • Verify that discharge pipe is present for the TPR (temperature pressure relief valve). It must not reduce in diameter (usually 3⁄4 inch) and should terminate more than 6 inches but less than 24 from the floor. Alternatively, it can discharge into the crawl space or drain system.
    • For electric heaters:
      • The electrical line should be inside a rigid conduit.
    • For gas heaters:
      • Verify the burner area is free of debris, including rust flakes.  If the unit is in a garage, it should be at least 18” off the floor.

INTERIOR

  • The door between the garage and the interior of the home should be a fire rated metal or solid wood door.
  • All exterior doors should be metal or solid wood doors. Hollow core doors are allowed with a secure storm door.
  • All doors and windows should operate freely, close properly and should not be loose in their mountings/frames.
  • If you have a fireplace- Gas units should have their pilot lights lit and wood units should be free of ashes.

    APPLIANCES
  • Verify all permanently installed appliances, kitchen exhaust hood, attic fans, fire alarms, ceiling fans, door bells and those remaining with the property operate as designed with no leaks or safety hazards. If you have a remote for any of these items, please leave it in a noticeable location for the inspector. In conclusion, if there is anything that we have missed and it is not functional, damaged or in ill repair; it must be listed on the disclosure form for the sake of all parties involved in the transaction.
Read More

What to Expect from Your Home Inspection

Why do I Need a Home Inspection?

The purchase of a home is probably the largest single investment you will ever make. You should learn as much as you can about the condition of the property and the need for any major repairs before you buy, so that you can minimize unpleasant surprises and difficulties afterwards.

Of course, a home inspection also points out the positive aspects of a home, as well as the maintenance that will be necessary to keep it in good shape. After the inspection, you will have a much clearer understanding of the property you are about to purchase.

If you are already a homeowner, a home inspection may be used to identify problems in the making, and to learn preventive measures that might avoid costly future repairs. If you are planning to sell your home, you may wish to have an inspection prior to placing your home on the market. This will give you a better understanding of conditions which may be discovered by the buyer’s inspector, and an opportunity to make repairs that will put the house in better selling condition.

What does a Home Inspection Include?

Inspectors typically do not provide warranties or guarantees with their inspections and reports. Buyers should therefore not rely on the inspection as any form of insurance policy against any latent, hidden, concealed or future defects and deficiencies.

The standard home inspector’s report will review the condition of the home’s heating system, central air conditioning system (temperature permitting), interior plumbing and electrical systems; the roof, attic, and visible insulation; walls, ceilings, floors, windows and doors; the foundation, basement, and visible structure.

The following are also some key items that buyers should remember and consider when reviewing their inspection reports:

  1. Inspections are not code-compliance evaluations.
  2. Inspection reports are not structural engineering reports.
  3. Systems and components that are off during the inspection are not tested or reactivated.
  4. Buyers should consult with and ask questions of owners and their representatives.
  5. Roof inspections and their components are typically done by an inspector walking on the roof. However, steeply sloped roofs or roofs covered with a material that can be damaged will be inspected from the eave or by binoculars.
  6. Reports are confidential and are meant exclusively for our client.
  7. Inspectors typically will not find each and every defect in a building; hence buyers should anticipate future typical defects and deficiencies.
  8. Further evaluation by specialists is recommended for any areas showing defects/deficiencies.
  9. A final walk-through inspection should be carried out the day before passing by the new owners to double-check the condition of the building.

What Will it Cost?

The inspection fee for a typical one-family house varies geographically, as does the cost of housing. Similarly, within a given area, the inspection fee may vary depending upon the size of the house, particular features of the house, its age, and possible additional services, such as septic, well, or radon testing. It is a good idea to check local prices on your own.

However, do not let cost be a factor in deciding whether or not to have a home inspection, or in the selection of your home inspector. The knowledge gained from an inspection is well worth the cost, and the lowest-priced inspector is not necessarily a bargain. The inspector’s qualifications, including his experience, training, and professional affiliations, should be the most important consideration.

Before the Inspection:

Choose a home inspection company with top credentials. You have a goal, you want to be well informed, and you want to make a wise investment. Choose a home inspection company that understands your needs and will work with you to help you meet your goals.

Be Sure To Obtain a Written Home Inspection Report

Be sure that your home inspection report will be a detailed written report, not a handwritten checklist that is given to you at the conclusion of the home inspection. A checklist may be void of details and may not provide all of the information advice you need.

Don’t Be Confused by Home Inspector “Certifications”

Don’t be confused by home inspector “certifications” offered by, or sold by trade societies or companies, or obtained via home inspection home study courses, certifications are available to anybody, a high school diploma is not a requirement and certifications can be readily purchased. Choose an ISHI Certified member that follows strict Operating Principles and Inspector Standards.

During the Inspection:

Be Sure to Attend the Home Inspection

Be sure to attend the home inspection; the inspection should take about two hours. One picture is worth a thousand words, and this is a unique opportunity to learn about your new home and its systems.

Be Sure that the Home Inspector is Well Equipped

The home inspector should be fully equipped with necessary tools including electrical testers, a fuel gas and carbon monoxide detector, moisture meter, ladder, inspection mirror, flashlight, level, and other home inspection tools.

Be Sure to Follow the Home Inspector and Ask Questions

“Location, Location, Location.” You’ve heard that often enough when looking for a home. But once you find the home that’s right for you, there’s nothing more important than Foundation!

You need to know that the home you are purchasing is properly leveled (that’s an important reason for retaining the services of a home inspection company an ISHI-Certified PhI Member).

The physical, plumbing, heating, air-conditioning, and electrical systems should be thoroughly inspected and evaluated. The home inspector should look for aluminum electrical distribution wires, electrical systems that are not adequate for modern usage, lead and galvanized steel water supply pipes, aged and inefficient heating and air-conditioning systems, etc.

The home inspector should be able to include an inspection for wood-destroying insects that will be accepted by your mortgage lender. Let the inspector know up front so that he can bring along a qualified specialist.

If the home has a well and/or septic system, these systems should also be able to be evaluated. Please let the inspector know up front so that he can bring along a qualified specialist.

Consider Optional Ancillary and Environmental Services

Where applicable, testing underground storage tanks, testing paint for lead, testing drinking water for lead, testing well supplied drinking water for bacteria, testing for radon gas in air, testing for urea formaldehyde foam insulation, etc. Please let the inspector know up front so that he can bring along a qualified specialist.

Be Sure to Obtain a Full Verbal Report at the Time of Inspection

The home inspection report should be available the next working day after the home inspection but a full verbal report should be obtained at the conclusion of the home inspection.

After the Inspection:

You Should Know:

  • The condition of the home you are purchasing, including all positive and negative aspects.
  • What repairs are needed (as well as the urgency of those repairs) and the magnitude of the repair costs.
  • The proper course of corrective repairs, and whether alternatives are available.
  • If there are any safety issues that need immediate attention.

You Should Expect:

  • An easy-to-understand, detailed home inspection report in writing.
  • Answers to any questions you may have regarding the report.
  • The home inspector to be available to answer future questions.

You Should Not Expect:

  • The home inspector to offer to repair, for a fee, any uncovered defects.
Read More

What is a Home Inspection

A home inspection is defined as an objective visual examination of the physical structure and systems of a home, from the roof to the foundation. In layman’s terms, having a home inspected is akin to giving it a physical check-up. If problems or symptoms are found, the inspector may recommend further evaluation.

As a home buyer/seller or real estate professional, you have a right to know exactly what a typical real estate inspection is. The following information should give you a better understanding of exactly what your inspector should (and should not) do for you during the course of a home inspection.

First and foremost, an inspection is a visual survey of those easily accessible areas that an inspector can clearly see. No destructive testing or dismantling is done during the course of an inspection, hence an inspector can only tell a client exactly what was clearly in evidence at the time and date of the inspection. The inspectors eyes are not any better than the buyers, except that the inspector is trained to look for specific tell-tale signs and clues that may lead to the discovery of actual or potential defects or deficiencies.

Inspectors base their inspections on the current industry standards provided to them by their professional societies. These Standards tell what the inspector will and can do, as well as what the inspector will not do. Many inspectors give a copy of the standards to their clients. If your inspector has not given you a copy, ask for one, or contact us.

The Industry Standards clearly spell out specific areas in which the inspector must identify various defects and deficiencies, as well as identifying the specific systems, components and items that are being inspected. There are many excluded areas noted in the standards that the inspector does not have to report on, for example; private water and sewer systems, solar systems, security systems, etc… These are usually considered ancillary inspections. The inspector is not limited by the standards and if the inspector wishes to include additional inspection services (typically for an extra fee) then he/she may perform as many specific inspection procedures as the client may request. Some of these additional services may include wood-boring insect inspection, radon testing or a variety of environmental testing, etc.

Many inspectors do not test or inspect appliances, for many good reasons. Appliances can break down almost immediately after the inspection and the buyer may hold the inspector liable. There have been cases where homeowners have switched appliances with lesser quality units after the inspection. If your inspector does test and inspect appliances you should keep in mind that any appliance can fail at anytime, particularly if the units are several years old or older. Our inspectors are thoroughly trained to test appliances to give our customers top-notch service.

Most inspectors will not give definitive cost estimates for repairs and replacements since the costs can vary greatly from one contractor to another. Inspectors typically will tell clients to secure three reliable quotes from those contractors performing the type of repairs in question.

Life expectancies are another area that most inspectors try not to get involved in. Every system and component in a building will have a typical life expectancy. Some items and units may well exceed those expected life spans, while others may fail much sooner than anticipated. An inspector may indicate to a client, general life expectancies, but should never give exact time spans for the above noted reasons.

The average time for an inspection on a typical 3-bedroom home usually takes 2 to 4 hours, depending upon the number of bathrooms, kitchens, fireplaces, attics, etc., that have to be inspected. Inspections that take less than two hours typically are considered strictly cursory, “walk-through” inspections and provide the client with less information than a full inspection.

Many inspectors belong to national inspection organizations such as ISHI, NACHI, ASHI, and NAHI. These national organizations provide guidelines for inspectors to perform their inspections. The International Society of Home Inspectors, (ISHI) requires its members to write a Fair & Balanced report by requiring such notations as, positive attributes, discretionary improvements, general comments, etc. to be included in their findings. Professional associations also provide educational materials and programs for its members in order to provide a continuing education for professional inspectors. Make sure that you as a consumer ask your inspector about his/her credentials and affiliations.

All inspectors provide clients with reports. The least desirable type of report would be an oral report, as they do not protect the client, and leave the inspector open for misinterpretation and liability. Written reports are far more desirable, and come in a variety of styles and formats.

The following are some of the more common types of written reports:

  1. Checklist with comments
  2. Rating System with comments
  3. Narrative report with either a checklist or rating system
  4. Pure Narrative report

Inspectors differ on what they consider the best type of report. Some prefer one over the other. ISHI recommends that the report be such that the reader can fully understand the findings of the inspector and all of the ramifications of such findings. In this case either #3 or #4 would suffice, while #1 and #2 types of reports are considered less than adequate.

Four key areas of most home/building inspections cover the exterior, the basement or crawlspace areas, the attic or crawlspace areas and the living areas. Inspectors typically will spend sufficient time in all of these areas to visually look for a host of red flags, telltale clues and signs or defects and deficiencies. As the inspector completes a system, major component or area, he/she will then discuss the findings with the clients, noting both the positive and negative features

The inspected areas of a home/building will consist of all of the major visible and accessible electro-mechanical systems as well as the major visible and accessible structural systems and components of a building as they appeared and functioned at the time and date of the inspection.

Read More